I love music. I have since I was little. Besides the fiber arts, music is my absolute favorite art form. So why not combine my two favorite things?
Today I'm going to show you how I covered my headphones with knitting. Let's go!
First things first: I used white Sony headphones. The exact model I used can be found
here on Amazon for around $15. Obviously, I can't provide a tutorial that will cover ALL the headphones out there, so you may have to do a bit of customizing to fit your specific pair. This will be more of a recipe rather than a pattern.
A few things to keep in mind:
1) Make sure your headphones have screws visible somewhere. Otherwise, you won't be able to disassemble your headphones to cover the individual pieces.
2) Ultimately, use headphones that are made of simple basic shapes, just two circles and a rectangular band. Knitting around crazy shapes can make this project pretty tough.
3) If you can, use headphones that are all one color. Depending on your gauge, you may be able to see through your knitting slightly. Solid white or black will make your work look a lot cleaner.
I used worsted weight yarn and a size 3 (3.25mm) needle. Wowzers, yeah, that's a pretty tight gauge. True, but it's important that you can't see through your knitting for this project. If you use 3s and can still see through your knitting, go even smaller.
Let's start by taking everything apart. Use a little eyeglass screwdriver to unscrew whatever you can. You should end up with something kinda like this. (PS. DON'T LOSE THOSE SCREWS!
I learned this lesson the hard way I mean, that's just
common sense, right?)
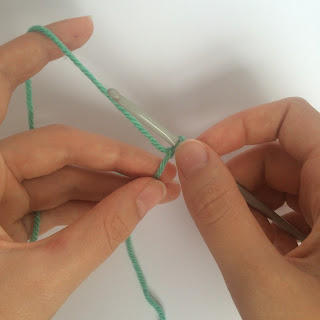
Let's cover the band first. I cast on 16 stitches
provisionally and knit in the round. You'll want to cast on as many as will fit snugly around your band without stretching too much. Knit this tube until it's as long as your band, plus like a quarter inch. Don't bind off. Rather, thread some strong fingering weight yarn through those top stitches. I'd suggest cotton or linen. :) You'll want to use this same yarn for your provisional cast on.
Now we're going to knit 2 octagons that will cover the round ear parts of the headphones (because octagons are easier to knit that circles!).
Note: If you're doing any sort of fair isle pattern on the ear circle, duplicate stitch it. Otherwise, it'll be upside down! :) Again, there's that
common sense shining through! ;)
Pattern (make 2):
CO 8
Row 1: p1, yo, p across to last stitch, yo, p1
Row 2: k1, yo, k across to last stitch, yo, k1
Row 3: p1, yo, p across to last stitch, yo p1
In row 4, we're going to yarn over in the middle of the row (and then knit it regularly on the next row) to create a hole for the place the band connects to the ear puff. That sounds really confusing, but bear with me.
Row 4: k1, yo, k5, yo twice, k5, yo, k1
Row 5: p1, yo, p to yo, drop 1 wrap of the yo, p2tog (the yarn over and the stitch next to it), p to last stitch, yo, p1
Repeat rows 2 & 3 until your piece is as wide as your earphone circle plus a little bit. I went until I had 26 stitches. Then,
work straight stockinette for a few rows (I did 7) just to add a little height.
End with a purl row.
Row 6: k1, k2tog, k across to last 3 stitches, k2tog, k1
Row 7: p1, p2tog, p across to last 3 stitches, p2tog, p1
Repeat rows 6 & 7 until you have 10 stitches left.
Now we're going to create a little slit in the top of our octagon so that we have a space for where the wire comes out of the ear.
Row 8: p1, p2tog, p2,
drop yarn, continue row with tail end of ball, p2, p2tog, p1
Row 9: *k2, pass 1st stitch over 2nd, k1, pass stitch over, k1, pass stitch over, cut yarn and pull through final loop,* pick up original strand of yarn and repeat the steps within the asterisks.
Ok. All the knitting is done!
We'll start by covering the circle parts. There are 3 steps to this process:
1) Glue down any movable parts on the headphone.
2) Place your knitted piece onto the headphone by tying the slit around the wire spot and popping the yarn-over space onto the plastic bit at the top.
3) Notice the little space in between the hard plastic of the headphone and the ear puff (for lack of a better term). Use a flat, thin object (I'm suggesting a knife but PLEASE BE CAREFUL. Only an adult should be doing that!) to shove the knitting into that little space. You really don't need glue! It's gonna be a tight fit. And since we aren't using glue, you can give your headphones a makeover as many times as you want!
All right, you should now have this!
Ok, the rest is pretty self-explanatory. Slide the band into the knitted tube, pop your ear buds back on, and screw it all back together. Oh! Remember that cotton we put into the ends of the knitted tube? You can use that string to gather up the tube around where the band connects to ear phones. This will give a nice, finished look.
Boom! All done!
I hope you enjoyed this tutorial! Feel free to leave comments, questions, and suggestions in the comments below.
See you next Friday!
Grace


